How to Create an Engaging Website with Hostinger in 2024: A Step-By-Step Tutorial for Beginners
In today’s digital age, having a website is crucial for establishing an online presence and reaching a wider audience. Whether you’re looking to expand your business, showcase your portfolio, or start a blog, a website can help you achieve your goals. The good news is that creating a website is now easier and more cost-effective than ever, thanks to user-friendly web development platforms and tools. You don’t need to be a tech expert or break the bank to build a stunning website. In this tutorial, we’ll guide you through the steps of creating your own website using a Hostingr’s website builder or WordPress, from choosing a template to publishing your site.
Key Takeaways:
- Creating a website is now easier and more cost-effective thanks to user-friendly web development platforms and tools, such as Hostinger Website Builder, which uses artificial intelligence (AI) to streamline the process in under an hour.
- Three crucial elements are required for a smooth web development process: a web development platform (e.g., WordPress or website builder), web hosting, and a domain name.
- Choose a suitable web development platform based on your needs, such as WordPress for customization options or a website builder like Hostinger for an all-in-one solution.
- Select a reliable web hosting provider, such as Hostinger, which offers performance and security enhancements, daily backups, and unlimited SSL certificates.
- Pick a memorable and relevant domain name that reflects your brand identity and resonates with your target audience, and consider a hosting provider that includes free domains with its plans.
- Use a website builder to create a website from scratch by picking and personalizing a template, creating site pages, adding functionality, populating pages with engaging content, optimizing for search engines, and publishing your website.
- AI-generated web design can simplify the website creation process, allowing you to create a website with a phone and leveraging AI to customize a template to fit your preferences.
Website Creation Prerequisites
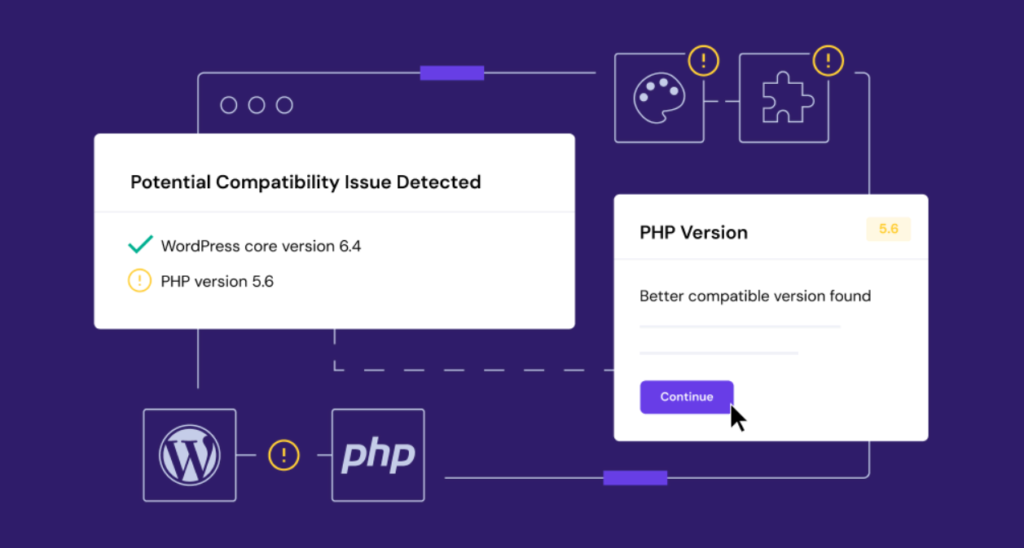
As you commence on your website creation journey, it’s crucial to understand the fundamental elements that will make your online presence a success. In this chapter, we’ll cover the three crucial prerequisites for a smooth web development process.
Web Development Platform
The advent of user-friendly web development platforms and tools has made building a website easier and more cost-effective. A website-building platform lets you set up a site without any coding knowledge. It comes in two types – content management system (CMS) and website builder. WordPress is a popular CMS that offers a wide range of customization options, making it a great choice for creating a customized website. Alternatively, a website builder like Hostinger’s website maker provides an all-in-one solution for website creation, offering ready-to-use templates and a drag-and-drop editor, simplifying the process for beginners or those pressed for time.
Check out our comparison of Hostinger Website Builder vs WordPress to explore their features (article 10), pros, and cons. With the right web development platform, you’ll be able to create a website that meets your needs and goals.
Web Hosting
The next crucial element is web hosting, which is like renting space on the internet for your website. Hosting providers store your site’s data on their servers, ensuring it’s accessible online. Besides server space, hosting providers also offer performance and security enhancements. That’s why choosing the right hosting plan is crucial for your site’s growth. Consider Hostinger’s Business Web Hosting for both personal and business websites, which features increased performance, daily backups, unlimited Secure Sockets Layer (SSL) certificates for secure connections, and robust protection against cyber threats.
Hostinger’s hosting plans include a no-code website builder and easy one-click WordPress installation for various web development needs. Leverage the 30-day money-back guarantee feature to test out its hosting features risk-free. Check out our guide to learn more about hosting a website, covering the steps and tips for selecting a hosting provider (Article 2).
Creation of a website requires a reliable web hosting service that ensures your site is always available and secure. With the right hosting plan, you can focus on creating a website that attracts and engages your target audience.
Domain Name
A crucial part of your branding strategy is a domain name, which is a unique address, such as “hostinflux.com” or “hostinger.com“, that lets internet users visit your website. Selecting the right domain extension, also known as the top-level domain (TLD), is just as important as the name itself. Extensions like .com, .net, and .org categorize your site and shape user perception. For example, businesses often choose.com for its broad recognition, while networks or tech sites may opt for.net.
You can buy a domain through a domain name registrar, which is a company that manages domain name reservations. Domain name costs generally depend on the extension and subscription period. However, opting for a hosting provider that includes free domains with its plans is simpler and more cost-effective. All Hostinger hosting plans come with a free domain, simplifying hosting and domain management under one account.
Domain names play a vital role in establishing your online identity. Choose a domain name that’s memorable, reflects your brand identity, and resonates with your target audience. Use Hostinger’s domain name checker to browse all the available domains and find the perfect one for your website.
Choosing the Right Domain Name

Even before you start building your website, you need to choose a domain name that accurately represents your brand and is easy for your target audience to remember. In this section, we’ll guide you through the factors to consider when selecting a domain name, domain name extensions, and tips for brainstorming a memorable domain name.
Factors to Consider When Selecting a Domain Name
Selecting a domain name is a decisive step in creating your online presence. You want a name that is not only memorable but also relevant to your brand and easy to spell. Here are some key factors to consider:
- Brand Identity: Your domain name should reflect your brand’s identity and values.
- Memorability: Choose a domain name that is easy to remember and stands out from the competition.
- Relevance: Ensure your domain name is relevant to your website’s content and target audience.
- Length: Keep your domain name concise and easy to type.
- Availability: Verify that the desired domain name is available and not already registered by someone else.
This is not an exhaustive list, but considering these factors will help you choose a domain name that effectively represents your brand online.
Domain Name Extensions (TLDs)
Even with a great domain name, you need to consider the right domain name extension (TLD) to complement it. A TLD is the suffix attached to your domain name, such as .com, .net, or .org. Here are some popular TLDs:
- .com: A popular choice for businesses and commercial websites.
- .net: Suitable for networks, technology, and infrastructure-related websites.
- .org: Often used by non-profit organizations and community-driven websites.
Consider the type of website you’re creating and the audience you’re targeting when selecting a TLD. For example, if you’re creating a business website,.com might be a suitable choice.
When choosing a TLD, remember that it can impact your website’s credibility and user perception. Ensure you select a TLD that aligns with your website’s purpose and target audience.
Tips for Brainstorming a Memorable Domain Name
Selecting a memorable domain name can be challenging, but here are some tips to help you brainstorm:
- Use Keywords: Incorporate relevant keywords related to your website’s content or niche.
- Keep it Simple: Choose a domain name that is easy to spell and remember.
- Be Creative: Think outside the box and come up with a unique domain name that stands out.
- Check Availability: Verify that the desired domain name is available and not already registered by someone else.
Recognizing the importance of a memorable domain name, take your time to brainstorm and come up with a name that accurately represents your brand and resonates with your target audience.
Factors such as brand identity, memorability, and relevance play a vital role in selecting a domain name. By considering these factors and following the tips outlined above, you’ll be well on your way to creating a stunning website that effectively represents your brand online.
How to Make a Website with a Website Builder
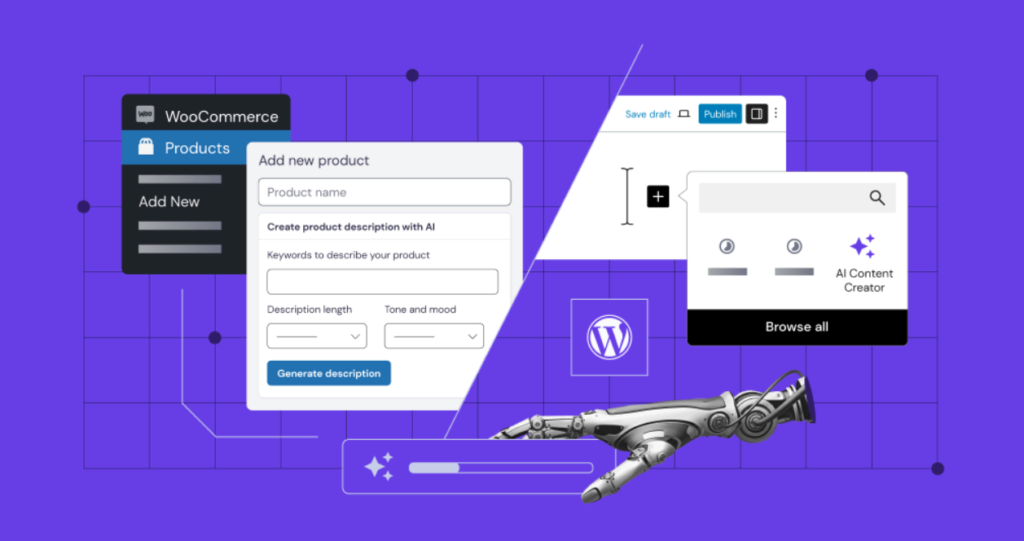
Once again, creating a website with a website builder is a straightforward process that requires minimal technical knowledge. In this section, we’ll guide you through the steps to build a stunning website using Hostinger Website Builder.
Step 1: Pick and Personalize Your Template
On the hunt for the perfect template, you’ll want to choose one that aligns with your branding. Hostinger offers 150 responsive templates for various niches, all made with mobile optimization in mind. They ensure your website is mobile-friendly, offering a consistent user experience on desktop and mobile devices. Alternatively, let AI customize a template to fit your preferences.
Take advantage of AI-generated web design using Hostinger’s site builder: Go to Websites from hPanel, Hostinger’s control panel, and select Add website → Hostinger Website Builder. Click Start creating to begin the AI onboarding. Enter your brand details and website type, and let AI create a website design tailored to your needs.
Step 2: Create Site Pages
Now that you have your template, it’s time to create site pages. One of the best advantages of leveraging Hostinger’s site builder’s AI onboarding flow is the time saved by not creating web pages from scratch. List the pages you require in the onboarding form, and AI will make them for you to customize further.
If you need more, making a web page yourself is easy and quick. Use the built-in page templates or AI to generate a custom page, and then customize it to fit your needs. Remember to keep your page structure organized and aligned with your website goals.
Template sections are designed to be flexible, allowing you to easily add, remove, or reorder them as needed. Experiment with different layouts and designs until you find the perfect fit for your website. And don’t forget to optimize your pages for search engines to improve your website’s visibility.
Adding Functionality to Your Website
To make your website more engaging and interactive, you need to add functionality to it. This can include features such as contact forms, social media integration, e-commerce capabilities, and more.
Understanding the Importance of Functionality
Some websites may look visually appealing, but lack the functionality to engage users and achieve their goals. Adding functionality to your website can enhance the user experience, increase conversions, and set you apart from competitors. For instance, a website with a contact form can encourage visitors to get in touch with you, while a website with e-commerce capabilities can allow customers to make purchases directly from your site.
Functionality can also improve your website’s search engine optimization (SEO). Search engines like Google favor websites that are user-friendly and provide a good experience, so adding functionality can help improve your website’s ranking.
How to Add Features to Your Website Using Hostinger’s Website Builder
To add features to your website using Hostinger’s website builder, you can follow these steps:
To get started, log in to your website builder account and navigate to the dashboard. From there, you can browse the available features and integrations, such as contact forms, social media plugins, and e-commerce tools. Choose the features that align with your website’s goals and needs, and follow the instructions to add them to your site.
With Hostinger’s website builders, you can drag and drop features onto your website’s pages, making it easy to customize and arrange your content. You can also use the website builder’s built-in settings to configure the features and integrations to your liking.
For example, if you want to add a contact form to your website, you can drag and drop the contact form feature onto your page, and then customize the form fields, layout, and design to match your website’s style.
Tips for Enhancing User Experience
Tips for enhancing user experience include:
- Make it mobile-friendly: Ensure that your website is optimized for mobile devices, as most users access websites through their smartphones.
- Use clear and concise language: Avoid using jargon or complex terminology that may confuse users.
- Organize content logically: Structure your website’s content in a logical and easy-to-follow manner.
- Use high-quality images: Use high-quality images that are relevant to your content and help to break up text.
- Test and iterate: Continuously test your website and gather feedback from users to identify areas of improvement.
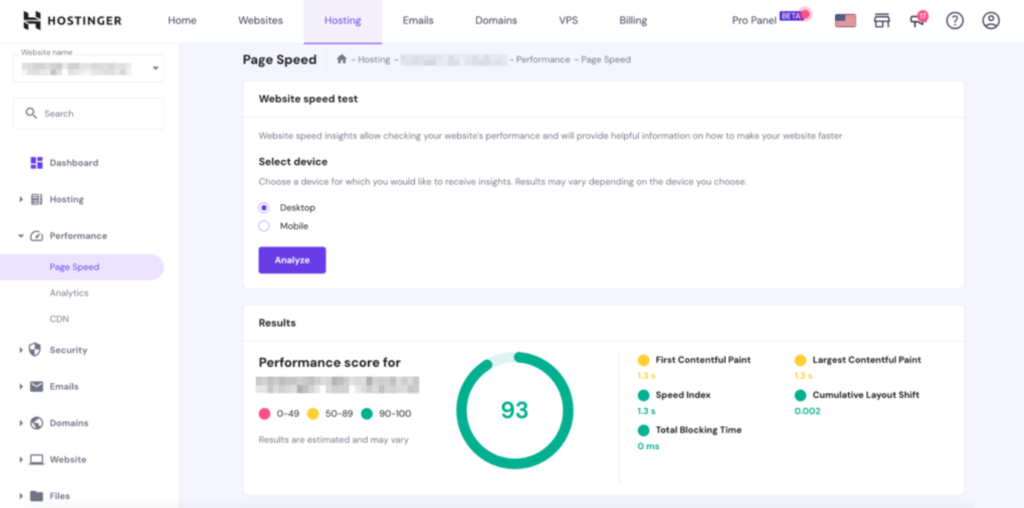
It’s also important to consider the loading speed of your website, as slow loading times can lead to high bounce rates and a poor user experience. You shall optimize your website’s images and code to ensure fast loading times!
Populating Pages with Engaging Content
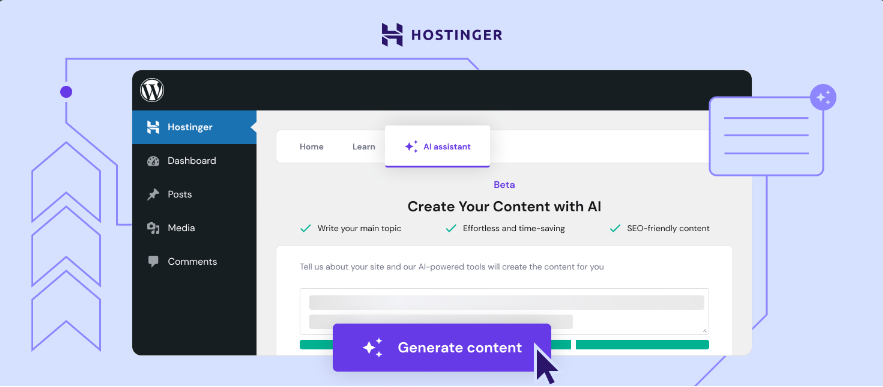
Not only does your website’s design play a crucial role in capturing visitors’ attention, but the content within those pages is equally important. Engaging content is what keeps users coming back for more, and it’s imperative for converting them into loyal customers.
The Role of Content in Website Success
Clearly, content is the backbone of any successful website. It’s what communicates your brand’s message, values, and personality to your target audience. Without high-quality, engaging content, your website risks becoming a mere shell, lacking the substance needed to attract and retain users.
When done correctly, content can increase user engagement, drive conversions, and even improve your website’s search engine rankings. It’s what sets you apart from your competitors and establishes your brand as an authority in your industry.
How to Create Engaging Content for Your Website
Website owners often struggle to create content that resonates with their audience. To overcome this challenge, focus on understanding your target audience’s needs, interests, and pain points. This will help you craft content that speaks directly to them, addressing their concerns and providing valuable solutions.
When creating content, remember to keep it concise, informative, and visually appealing. Break up large blocks of text with images, videos, or infographics to make your content more digestible and engaging.
To take your content to the next level, consider the following tips:
To create truly engaging content, focus on telling stories that resonate with your audience. Share your brand’s history, highlight customer success stories, or showcase your team’s expertise. Storytelling is a powerful way to connect with users on an emotional level, making your content more memorable and shareable.
Optimizing Your Website for Search Engines
Keep in mind that having a stunning website is only half the battle. To attract visitors and increase your online presence, you need to optimize your website for search engines.
Understanding Search Engine Optimization (SEO)
You’re probably familiar with search engines like Google, Bing, or Yahoo. These platforms use complex algorithms to rank websites based on their relevance, authority, and user experience. SEO is the process of improving your website’s visibility and ranking on search engines to drive more organic traffic.
Search engines crawl your website, indexing its content, structure, and keywords. When a user searches for a specific query, the search engine’s algorithm analyzes the indexed data to provide the most relevant results. A well-optimized website increases its chances of appearing on the first page of search engine results, making it more visible to your target audience.
How to Optimize Your Website for Search Engines
Website optimization involves several techniques to improve your website’s search engine ranking. Here are some crucial steps to get you started:
First, focus on creating high-quality, engaging, and informative content that targets specific keywords. Conduct keyword research to identify relevant terms and phrases your target audience uses. Use tools like Google Keyword Planner or Ahrefs to find the best keywords for your content.
Next, optimize your website’s structure and meta tags. This includes writing descriptive title tags, meta descriptions, and header tags (H1, H2, H3, etc.) that accurately represent your content. Ensure your website is mobile-friendly, has fast loading speeds, and is secure (HTTPS).
Engines like Google prioritize user experience, so make sure your website is easy to navigate, has a clear hierarchy, and provides valuable content. Internal linking, image optimization, and regular updates also contribute to a better search engine ranking.
Tips for Optimizing Content for Search Engines
There’s no denying the importance of search engine optimization (SEO) when it comes to getting your content seen by a wider audience. To optimize your content for search engines, focus on the following key areas:
- Keyword research: Identify relevant keywords and phrases your target audience is searching for, and incorporate them naturally into your content.
- Optimize meta tags: Craft compelling meta titles, descriptions, and keywords to help search engines understand the context and relevance of your content.
- Use header tags: Organize your content with header tags (H1, H2, H3, etc.) to structure your content and highlight important keywords.
- Content length and quality: Aim for comprehensive, well-researched content that provides value to your audience. Any content that’s too thin or lacks substance can negatively impact your SEO efforts.
A well-optimized content strategy can significantly improve your website’s search engine rankings, driving more organic traffic and increasing your online visibility.
Tips for Improving Your Website’s Visibility
Search engine optimization is an ongoing process. Here are some additional tips to improve your website’s visibility:
- Content marketing: Create high-quality, engaging, and informative content that targets specific keywords and resonates with your target audience.
- Local SEO: If you have a local business, optimize your website for local search by including your business’s name, address, and phone number (NAP) consistently across the web.
- Technical SEO: Ensure your website is mobile-friendly, has fast loading speeds, and is secure (HTTPS). Regularly update your website’s software and plugins to prevent security vulnerabilities.
- Link building: Build high-quality backlinks from authoritative sources to increase your website’s authority and ranking.
- Analytics and tracking: Use tools like Google Analytics to track your website’s performance, identify areas for improvement, and adjust your SEO strategy accordingly.
This concludes our guide on optimizing your website for search engines. By following these tips and staying up-to-date with the latest SEO trends, you’ll be well on your way to improving your website’s visibility and driving more organic traffic.
Your website’s success depends on its ability to attract and engage with your target audience. By optimizing your website for search engines, you’ll increase your online presence, drive more traffic, and ultimately achieve your website goals.
Publishing Your Website
Not quite there yet! Before you launch your website, there are a few final steps to ensure everything is in place.
The Final Steps Before Launching Your Website
The final countdown begins! Double-check that all your pages are complete, and your content is engaging and optimized for search engines. Review your website’s navigation menu to ensure it’s user-friendly and easy to navigate. Make sure all internal and external links are working correctly, and your contact forms are set up to receive inquiries.
Take a step back, and preview your website on different devices and browsers to ensure it looks and functions as intended. This is your last chance to make any necessary adjustments before going live.
How to Publish Your Website Using Hostinger’s Website Builder
If you’ve built your website using a website builder like Hostinger Website Builder, publishing it is a breeze. Simply click the “Publish” button, and your website will be live for the world to see.
Publishing your website using a website builder is a straightforward process that requires minimal technical expertise. The website builder will handle the technical aspects, so you can focus on creating a stunning website that resonates with your audience.
Publishing your website is just the beginning. Once it’s live, you’ll need to maintain and update it regularly to keep your audience engaged and attract new visitors.
Tips for Post-Launch Maintenance
The work doesn’t stop after launching your website. To keep your website thriving, you’ll need to perform regular maintenance tasks, such as:
- Updating content: Keep your content fresh and relevant to attract repeated visitors and improve search engine rankings.
- Monitoring analytics: Track your website’s performance using analytics tools to identify areas for improvement.
- Fixing broken links: Regularly check for broken links and fix them to ensure a smooth user experience.
- Backing up your website: Regularly back up your website to prevent data loss in case of technical issues.
The key to a successful website is ongoing maintenance and improvement. By following these tips, you’ll be well on your way to creating a stunning website that attracts and engages your target audience.
Website maintenance is an ongoing process that requires regular attention. By staying on top of these tasks, you’ll ensure your website remains secure, fast, and relevant to your audience.
How to Make a Website with WordPress
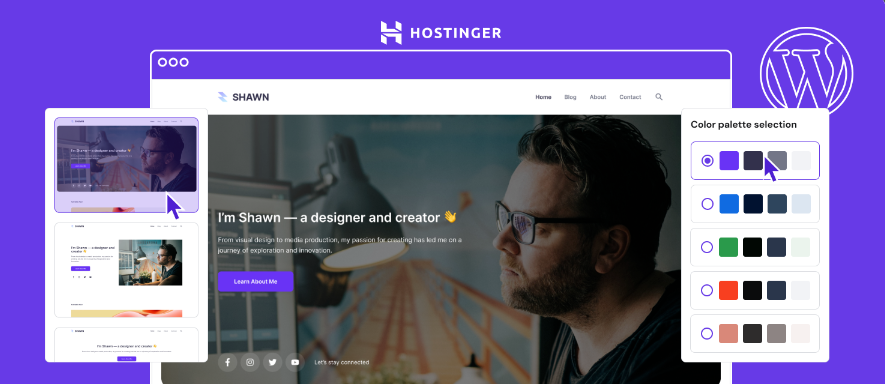
Many people choose WordPress as their website-building platform due to its flexibility, customization options, and extensive community support. With WordPress, you can create a unique website that meets your specific needs. Here’s a step-by-step guide to help you get started:
Step 1: Install WordPress
Step into the world of WordPress by installing it on your website. You can do this in two ways: manually or through a one-click installation process offered by your web hosting provider. Manual installation requires technical knowledge, so we recommend using the one-click installation method for a hassle-free experience. If you’re using Hostinger, follow these steps:
Log in to your hPanel account, navigate to the Websites section, and click on Add website. Select WordPress as your website builder, and then click Install WordPress. Fill in the required information, such as your website title, admin username, and password. Once you’ve completed the installation process, you’ll receive an email with your login credentials.
Alternatively, you can also install WordPress manually by downloading the software from the official WordPress website and uploading it to your website’s root directory via FTP or SFTP. However, this method requires more technical expertise and is not recommended for beginners.
Step 2: Install a WordPress Theme
Install a WordPress theme to give your website a unique look and feel. Choose a theme that aligns with your brand identity and is responsive, meaning it adapts to different screen sizes and devices. You can browse the official WordPress theme directory or third-party marketplaces like ThemeForest or Mojo-Themes.
Log in to your WordPress dashboard, navigate to Appearance > Themes, and click on Add New. Search for a theme, and then click Install to download and activate it. You can also upload a theme manually by clicking on Upload Theme and selecting the theme’s ZIP file.
Install a theme that is regularly updated and has good ratings to ensure compatibility with the latest WordPress versions and security patches.
Install a theme that offers a page builder or drag-and-drop editor to simplify the content creation process. Popular page builders include Elementor, Beaver Builder, and Divi Builder.
Step 3: Install WordPress Plugins
WordPress plugins enhance your website’s functionality and performance. Choose plugins that are compatible with your theme and WordPress version to avoid conflicts. You can browse the official WordPress plugin directory or third-party marketplaces like PluginForest or Mojo-Plugins.
Log in to your WordPress dashboard, navigate to Plugins > Add New, and search for a plugin. Click Install Now to download and activate it. You can also upload a plugin manually by clicking on Upload Plugin and selecting the plugin’s ZIP file.
Understanding plugin compatibility is crucial to avoid website crashes or errors. Always read reviews, check the plugin’s documentation, and test it on a staging site before installing it on your live website.
Creating Site Pages and Navigation Menu in WordPress

All websites, regardless of their purpose, require well-structured site pages and navigation menus to ensure a seamless user experience.
Understanding the Importance of a Well-Structured Site
Importance of a well-structured site cannot be overstated. It plays a crucial role in guiding visitors through your website, helping them find the information they need, and ultimately, achieving your website’s goals. A well-structured site also improves search engine optimization (SEO), as search engines can easily crawl and index your content.
A poorly structured site, on the other hand, can lead to high bounce rates, low engagement, and a negative user experience. It’s vital to plan your site’s structure carefully, considering the types of pages you need, how they will be organized, and how users will navigate through your site.
How to Create Pages and Navigation Menu in WordPress
Site creation in WordPress involves creating individual pages and organizing them into a logical structure using a navigation menu.
To create a new page in WordPress, follow these steps:
Create a new page by going to Pages > Add New in your WordPress dashboard. Enter a title for your page, add content using the editor, and customize settings as needed. Click Publish to save your page.
To create a navigation menu, go to Appearance > Menus in your WordPress dashboard. Click Create a new menu, add pages to your menu, and customize settings as needed. Click Save Menu to save your changes.
Create a logical hierarchy of pages and organize them into categories or subcategories to make it easy for users to find what they’re looking for.
Tips for Organizing Your Site’s Content
Creating a well-structured site requires careful planning and organization. Here are some tips to help you get started:
- Plan your site’s hierarchy: Determine the main categories and subcategories of your site, and organize your pages accordingly.
- Use clear and concise page titles: Use descriptive titles that accurately reflect the content of each page.
- Organize pages into logical groups: Use categories, tags, or custom taxonomies to group related pages together.
- Use a consistent navigation menu: Ensure that your navigation menu is consistent across all pages, making it easy for users to find what they’re looking for.
After creating your site’s structure, test it thoroughly to ensure that it’s easy to navigate and find information.
Optimizing Your Website’s Content: Best Practices
Well-structured content is vital for a positive user experience. Here are some additional tips to help you organize your site’s content:
- Use headings and subheadings: Organize your content using headings and subheadings to create a clear hierarchy of information.
- Break up long content: Divide long pages into shorter, more manageable sections to improve readability.
- Use images and multimedia: Use images, videos, and other multimedia elements to break up text and enhance the user experience.
After organizing your content, review it regularly to ensure that it remains relevant and up-to-date.
Populating the Website with Engaging Content in WordPress
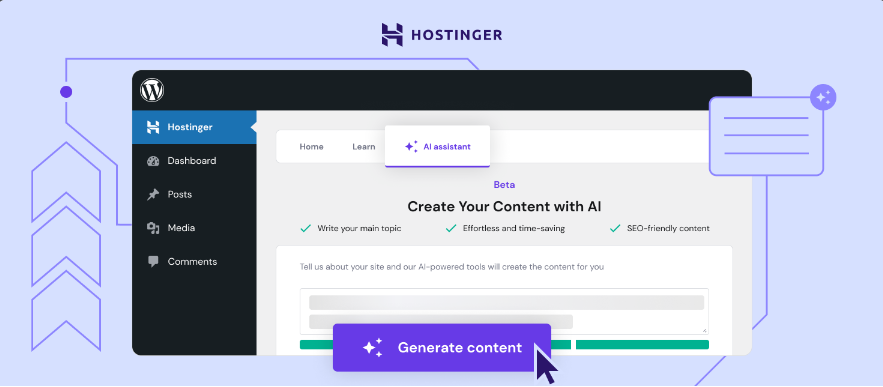
After setting up your WordPress website, it’s time to populate it with engaging content that will attract and retain visitors.
The Role of Content in WordPress Website Success
On a WordPress website, content plays a crucial role in driving user engagement, improving search engine rankings, and ultimately, achieving your online goals. High-quality content helps establish your brand’s authority, builds trust with your audience, and sets you apart from competitors. Moreover, search engines like Google favor websites with fresh, relevant, and informative content, which can lead to higher search engine rankings and increased organic traffic.
Creating engaging content is not only about writing articles or blog posts; it’s about crafting a compelling narrative that resonates with your target audience. Your content should educate, entertain, or inspire your visitors, encouraging them to take actions, share your content, or return to your website.
How to Create Engaging Content for Your WordPress Website
Little do people know that creating engaging content is a skill that can be developed over time with practice and patience. To get started, identify your target audience, their pain points, and what motivates them. Then, focus on creating content that addresses their needs, using a conversational tone and language that resonates with them.
WordPress provides a range of tools and plugins to help you create engaging content, such as Yoast SEO, which offers suggestions for improving your content’s readability and search engine optimization. You can also use page builders like Elementor or Hostinger’s website Builder to create visually appealing layouts and designs.
When creating content, remember to:
- Keep it concise and scannable, using headings, subheadings, and bullet points to make your content easy to read.
- Use attention-grabbing headlines that accurately reflect the content of your article or blog post.
- Incorporate high-quality images and videos to break up text and enhance user engagement.
- Optimize your content for SEO, using relevant keywords, meta descriptions, and optimizing images.
Assume that your content will be shared across various platforms, so make sure it’s optimized for different devices and screen sizes.
Tips for Optimizing Content for Search Engines in WordPress
Your website’s content is the key to improving its search engine rankings. To optimize your content for search engines, follow these tips:
- Conduct keyword research to identify relevant keywords and phrases that your target audience uses.
- Use keywords strategically, incorporating them into your content, meta titles, and descriptions.
- Create high-quality, informative content that provides value to your audience.
- Optimize your images, using descriptive alt tags and file names that include target keywords.
To further optimize your content, use WordPress plugins like Yoast SEO or All in One SEO Pack, which provide suggestions for improving your content’s search engine optimization.
Assume that search engines will crawl and index your content regularly, so ensure it’s fresh, relevant, and informative.
To learn more about creating engaging content and optimizing it for search engines, check out our guides on content marketing and SEO.
Optimizing Your Website for Search Engines in WordPress
Despite the importance of having a stunning website, it’s equally crucial to ensure that your website is visible to your target audience. Search Engine Optimization (SEO) plays a vital role in increasing your website’s visibility and driving organic traffic to your site.
Understanding Search Engine Optimization (SEO) in WordPress
WordPress, being a popular Content Management System (CMS), offers a range of SEO-friendly features and plugins that can help you optimize your website for search engines. WordPress SEO involves optimizing your website’s content, structure, and coding to rank higher in search engine results pages (SERPs).
WordPress provides a solid foundation for SEO, with features like customizable permalinks, meta titles, and descriptions. Additionally, there are numerous SEO plugins available, such as Yoast SEO and All in One SEO Pack, that can help you optimize your website’s content and structure for search engines.
How to Optimize Your Website for Search Engines in WordPress
WordPress offers a range of built-in features and plugins that can help you optimize your website for search engines. Here are some steps to optimize your website for search engines in WordPress:
WordPress, being a highly customizable CMS, allows you to optimize your website’s content, structure, and coding to rank higher in search engine results pages (SERPs). Start by optimizing your website’s title tags, meta descriptions, and header tags, which are important for search engine rankings.
Another crucial step is to optimize your website’s content by using relevant keywords, creating high-quality and engaging content, and ensuring that your content is easily crawlable by search engines.
Tips for Improving Your Website’s Visibility in WordPress
Your website’s visibility is crucial for driving organic traffic and increasing conversions. Here are some tips to improve your website’s visibility in WordPress:
- Use relevant and high-volume keywords in your website’s content to increase its visibility in search engine results pages (SERPs).
- Optimize your website’s images by using descriptive alt tags, file names, and compressing images to reduce page load times.
- Create high-quality and engaging content that provides value to your target audience and encourages them to share your content.
- Use internal and external linking to improve your website’s navigation, increase page authority, and reduce bounce rates.
- Regularly update your website’s content to keep search engines crawling your website and to increase its visibility in search engine results pages (SERPs).
The key to improving your website’s visibility is to focus on creating high-quality and engaging content that provides value to your target audience. By following these tips and optimizing your website for search engines, you can increase your website’s visibility and drive organic traffic to your site.
Search engine optimization is an ongoing process that requires regular monitoring and improvement. By staying up-to-date with the latest SEO trends and best practices, you can ensure that your website remains visible and competitive in search engine results pages (SERPs).
Publishing Your WordPress Website with Histinger

For many, the final stages of creating a WordPress website can be the most exciting – and intimidating. But don’t worry, we’ve got you covered!
The Final Steps Before Launching Your WordPress Website
While you’ve made significant progress on your website, there are a few crucial tasks to complete before launching it to the world. Take a deep breath and tackle these final steps:
Review your website’s content, layout, and overall user experience to ensure everything is perfect. Check for broken links, typos, and inconsistencies in design. Make any necessary adjustments to create a cohesive and engaging website.
Test your website’s functionality, including contact forms, payment gateways, and any other interactive elements. Ensure that everything works seamlessly and as intended.
How to Publish Your WordPress Website
Clearly, publishing your WordPress website is a significant milestone. To do so:
Log in to your hPanel in Hostinger then WordPress dashboard and navigate to the Settings > General page. Update your site title, tagline, and timezone as needed.
Click on the “Save Changes” button to confirm your updates. Your website is now live and accessible to the public!
WordPress allows you to control who can view your website during its development phase. To make your website publicly accessible, go to Settings > Reading and toggle the “Search Engine Visibility” option to “Discourage search engines from indexing this site” to “Allow search engines to index this site“.
WordPress provides an intuitive publishing process. Once you’ve completed the above steps, your website will be live and ready for the world to see!
Tips for Post-Launch Maintenance in WordPress
Website maintenance is vital to ensure your online presence remains strong and secure. Here are some vital tips:
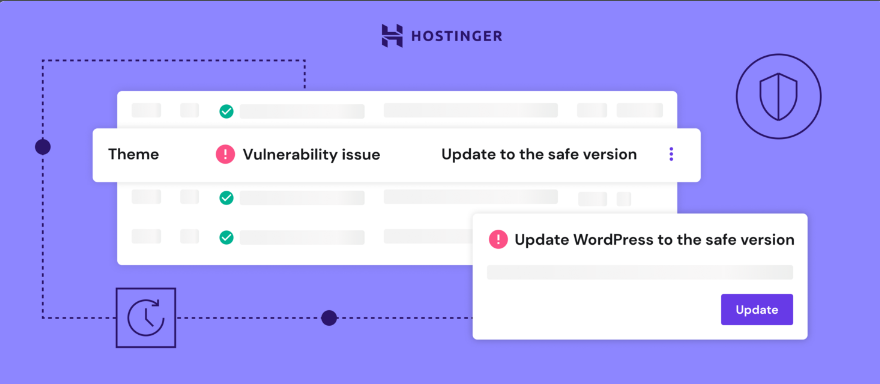
- Regularly update your WordPress core, themes, and plugins to prevent security vulnerabilities and ensure compatibility.
- Monitor your website’s performance using tools like Google Analytics and PageSpeed Insights to identify areas for improvement.
- Backup your website regularly to prevent data loss in case of unexpected issues.
- Keep your website’s content fresh and engaging by regularly posting new articles, updating products, or adding new features.
WordPress makes it easy to maintain your website with its built-in tools and plugins. Take advantage of these resources to ensure your website remains secure, fast, and engaging.
- Use security plugins like Wordfence or MalCare to protect your website from malware and other threats.
- Leverage caching plugins like W3 Total Cache or WP Super Cache to improve your website’s loading speed.
- Utilize SEO plugins like Yoast SEO or All in One SEO Pack to optimize your website’s search engine rankings.
Recognizing the importance of post-launch maintenance will help you build a strong online presence and attract a loyal following.
Frequently Asked Questions
Despite the ease of creating a website using Hostinger as you Hosting provider, you may still have some questions. Let’s address some of the most common ones.
Do You Need Technical Knowledge to Make a Website with Hostinger?
To answer this, no, you don’t need technical knowledge to make a website. With the rise of user-friendly web development platforms and tools, creating a website has become more accessible than ever. For example, Hostinger Website Builder uses artificial intelligence (AI) to streamline the process, making it possible to create a website in under an hour. Even if you’re not tech-savvy, you can still create a stunning website with minimal effort.
Website builders like Hostinger provide drag-and-drop editors, pre-designed templates, and intuitive interfaces that make it easy to customize your website without coding knowledge. If you need help, there are also plenty of resources available, including tutorials, guides, and 24/7 customer support.
How Much Does It Cost to Create a Website with Hostinger?
Frequently, people ask about the cost of creating a website. The good news is that it’s more affordable than you think. With Hostinger, you can create a website for as low as $3.99/month, which includes web hosting, a free domain, and access to a website builder. This plan also comes with a 30-day money-back guarantee, so you can try it risk-free. Not to forget that the Business plan of as $3.99/month is for 100 Websites and 100 business Email account.
Website costs can vary depending on your needs, but with Hostinger, you can get started with a basic plan for a low monthly fee. As your website grows, you can always upgrade to a more advanced plan or add features like e-commerce functionality or SEO tools.
Website owners often wonder how they can monetize their website. The answer is simple: you can earn money through advertising, affiliate marketing, selling products or services, or even membership sites. The possibilities are endless, and it all starts with creating a website that attracts and engages your target audience.
How Do I Create a Business Website?
Even if you’re not tech-savvy, creating a business website is easier than you think. With Hostinger Website Builder, you can create a professional-looking website in minutes. Simply choose a template, customize it to fit your brand, and add your content. You can also add features like contact forms, social media integration, and e-commerce functionality to make your website more functional.
Create a business website that reflects your brand identity and resonates with your target audience. Choose a domain name that’s memorable and easy to spell, and make sure your website is mobile-friendly to cater to a wider audience.
How Do Website Owners Get Paid?
Asked by many, getting paid as a website owner is possible through various methods. You can earn money through advertising, affiliate marketing, selling products or services, or even membership sites. The key is to create a website that attracts and engages your target audience, and then monetize it accordingly.
The amount you can earn depends on your website’s traffic, niche, and monetization strategies. With Hostinger, you can create a website that generates revenue through various channels, including Google AdSense, Amazon Associates, or selling digital products.
The possibilities are endless, and it all starts with creating a website that resonates with your target audience.
How Long Does It Take to Create a Website with Hostinger?
Website creation time varies depending on your needs and the complexity of your website. With Hostinger Website Builder, you can create a website in under an hour using AI-generated web design. If you prefer to customize your website from scratch, it may take a few hours or days, depending on your design skills and the number of pages you need.
Does time constraint hold you back from creating a website? Don’t worry! With Hostinger, you can create a website quickly and easily, even if you’re short on time.
How Many Products Can I Sell with Hostinger Website Builder?
On Hostinger Website Builder, you can sell an unlimited number of products with our e-commerce functionality. Whether you’re selling physical or digital products, our website builder makes it easy to set up an online store and start selling.
Long gone are the days of complicated coding and tedious setup processes. With Hostinger, you can create an online store in minutes and start selling your products to a global audience.
Be mindful of, creating a website is just the first step. The key to success lies in promoting your website, engaging with your audience, and continuously improving your online presence.
Final Words
Presently, you’ve reached the end of this comprehensive guide on how to create an engaging website in 2024. By following the step-by-step tutorial, you’ve successfully built your own website using a website builder or WordPress. Congratulations! You’ve taken a significant leap in establishing your online presence, and we’re thrilled to have been a part of your journey.
Be mindful of, your website is a dynamic entity that requires regular updates and maintenance to stay relevant and attract visitors. Continuously monitor your website’s performance, update your content, and explore new features to keep your audience engaged. If you encounter any challenges or have questions, refer to our FAQ section or reach out to our support team for assistance. You’ve got this, and we’re confident that your website will become a valuable asset for your personal or business endeavors!

