Are you planning to switch to a new hosting provider for better performance and security? Don’t worry, migrating your WordPress website is easier than you think! In this article, you’ll learn various methods to migrate your WordPress site, whether you’re moving a small blog or a large online store. This tutorial ensures that your site migration will be seamless and error-free, so you can focus on growing your online presence.
Effective Ways to Migrate Your WordPress Site: Step-by-Step Guide
Key Takeaways:
- Proper Preparation is Key: Before migrating a WordPress site, create a full backup, install WordPress on the destination host, put the website in maintenance mode, review and adjust settings, and clean up the site to ensure a smooth transition.
- 5 Easy Migration Methods: There are five methods to migrate a WordPress site, including using hPanel, migrating manually using hPanel, copying the website, migrating with a plugin, and migrating manually using cPanel.
- hPanel Migration: Hostinger’s free migration service is the easiest way to migrate a WordPress site to Hostinger, with a dedicated team managing the entire process.
- Manual Migration using hPanel: This method gives users complete control over the transfer process and is suitable for those who prefer a detailed approach or have specific customization goals.
- Copying a Website: Hostinger users can use the Copy Website feature to clone their existing site to a new location under the same hosting plan without affecting the original site’s files.
- Migrating with a Plugin: Plugins like All-in-One WP Migration can automate many steps involved in transferring a WordPress site, making the process easier and faster.
- Test Before Launch: Regardless of the migration method chosen, it’s necessary to test the site on the new host using a WordPress staging environment to ensure a smooth transition without impacting the live site’s functionality or user experience.
Essential Pre-Migration Checklist for WordPress: Ensuring a Smooth Transition
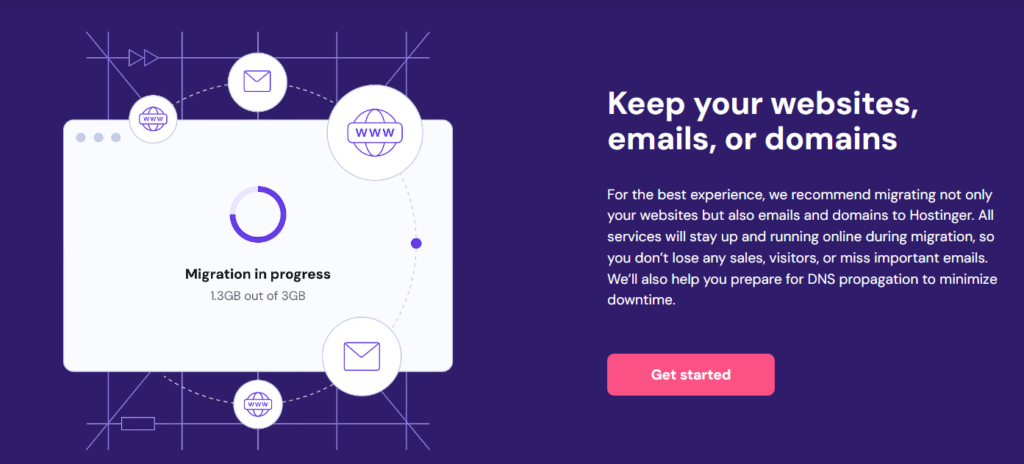
Your WordPress site migration requires careful planning and preparation to ensure a seamless transition. Before you start the migration process, there are several important steps to take to safeguard your data, minimize downtime, and ensure a smooth setup on the new hosting environment.
Create a Full Backup of Your WordPress Website
Clearly, creating a full backup of your WordPress website is the first and most critical step in the migration process. This includes all files, folders, and the database. Back up your entire site into a ZIP file using a plugin or your current hosting provider’s backup tool. This backup file will be your safety net should you need to restore your original site. Make sure to include all files, folders, and the database in your backup to ensure that you don’t miss any crucial data. A complete backup will give you peace of mind and protect your website’s content, theme, and plugins.
Install WordPress on the Destination Host
Assuming you’re moving to a new web host, ensure you have a fresh WordPress installation ready on the destination server. This will be the foundation for importing your existing WordPress website, making the transition smoother. Your new WordPress installation should be set up with the same version and configuration as your current site to minimize compatibility issues. This will also help you to identify any potential problems early on. Additionally, having a fresh WordPress installation on the destination host will give you a clean slate to work with, allowing you to start with a blank canvas and configure your site exactly as you want.
Put the Website in Maintenance Mode
One of the most important steps before migrating your WordPress site is to put it in maintenance mode. This will prevent any changes to your site during the migration process that might confuse your visitors. Disable caching plugins as they might interfere with the migration process. This will ensure that your site remains stable and functional during the transition. By putting your site in maintenance mode, you’ll be able to work on the migration process without worrying about users accessing your site and making changes that might affect the migration.
Review and Adjust Settings
Destination-specific settings, such as permalink structures, widget settings, and theme options, need to be reviewed and adjusted on the new WordPress site. Ensuring consistent configuration will help maintain the look and functionality of your site post-migration. Double-check your site’s settings to ensure that everything is set up correctly on the new host. This includes configuring your site’s timezone, date format, and other settings that might affect its functionality.
Clean Up Your Site
Site migration is an excellent opportunity to declutter your site. Remove any unused plugins, themes, or media files. A lighter site means a quicker migration and better performance. Delete any unnecessary files or data that are taking up space on your site. This will not only speed up the migration process but also improve your site’s overall performance and security. Plus, cleaning up your site will give you a chance to review your content and remove any outdated or irrelevant information, making your site more efficient and user-friendly.
Hostinger WordPress Migration: 5 Methods and Staging Environment Tips
Many WordPress site owners need to migrate their website to a new hosting provider or environment at some point. This can be a daunting task, but with the right approach, it can be done efficiently and effectively.
Overview of the 5 Migration Methods
The following five methods will guide you through the process of migrating your WordPress site. Each method has its own advantages and requirements, so it’s crucial to choose the one that best fits your needs and technical skills.
These methods include using Hostinger’s free migration service, migrating manually using hPanel, copying your website, using a plugin, and migrating manually using cPanel. Regardless of the method you choose, it’s crucial to prepare your site beforehand and consider using a WordPress staging environment to test your site before making it live.
Importance of Using a WordPress Staging Environment
If you’re planning to migrate your WordPress site, it’s highly recommended to use a WordPress staging environment to test your site before making it live. This will help ensure a smooth transition without impacting your live site’s functionality or user experience.
To create a staging environment, you can duplicate your live site and test the migration process in a controlled environment. This will allow you to identify and fix any issues before applying the changes to your live site.
Using a staging environment can save you from potential downtime, data loss, and other migration-related issues. It’s a crucial step in the migration process that can give you peace of mind and ensure a successful transition.
Streamlined WordPress Site Transfer with hPanel: A Complete Walkthrough
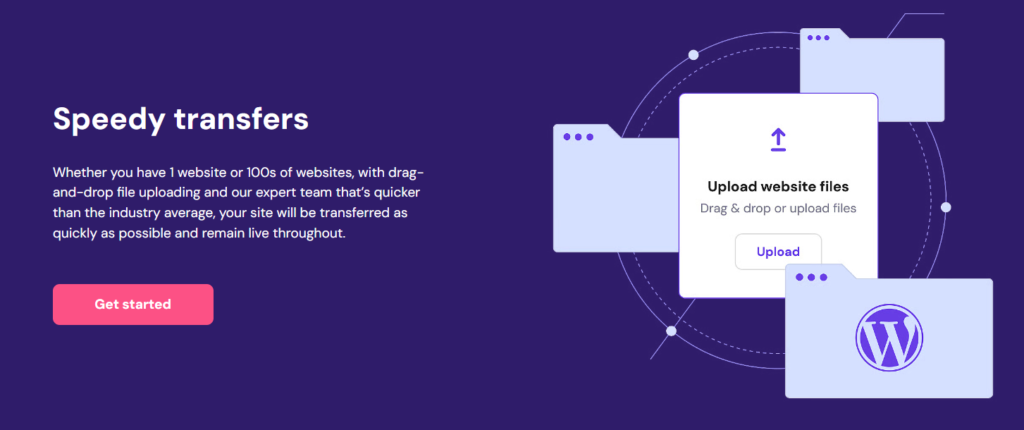
After considering the various reasons for migrating your WordPress website to Hostinger, you’re now ready to take the first step. One of the easiest ways to migrate your site is by using hPanel, a user-friendly control panel offered by Hostinger.
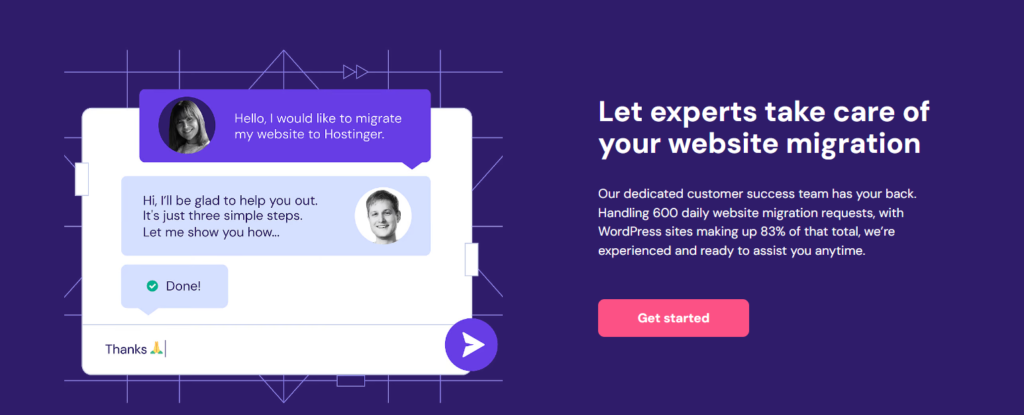
hPanel’s free migration service is the easiest way to migrate a WordPress site to Hostinger. Simply fill out a migration request on hPanel, and our dedicated team will manage the entire migration process for you. This method is perfect for those who want a hassle-free migration experience.
Before initiating a migration request, please disable any two-factor authentication (2FA) or anti-bot features on your current hosting account and wp-admin area. Also, ensure there is sufficient disk space on your current server to facilitate a backup. Next, choose a managed WordPress hosting plan at Hostinger. Here is a complete explanation about various Hostinger plans.
Requirements for Migrating with hPanel
Requirements for migrating your WordPress site using hPanel are minimal. You’ll need to have a Hostinger account, a managed WordPress hosting plan, and sufficient disk space on your current server for a backup. Additionally, ensure you have your WordPress admin credentials ready for verification.
Easy access to your website’s files and database is also necessary. If you’re not comfortable with this process, consider using a WordPress staging environment to test your site first on the new host. This helps ensure a smooth transition without impacting your live site’s functionality or user experience.
Steps to Request a Migration Using hPanel
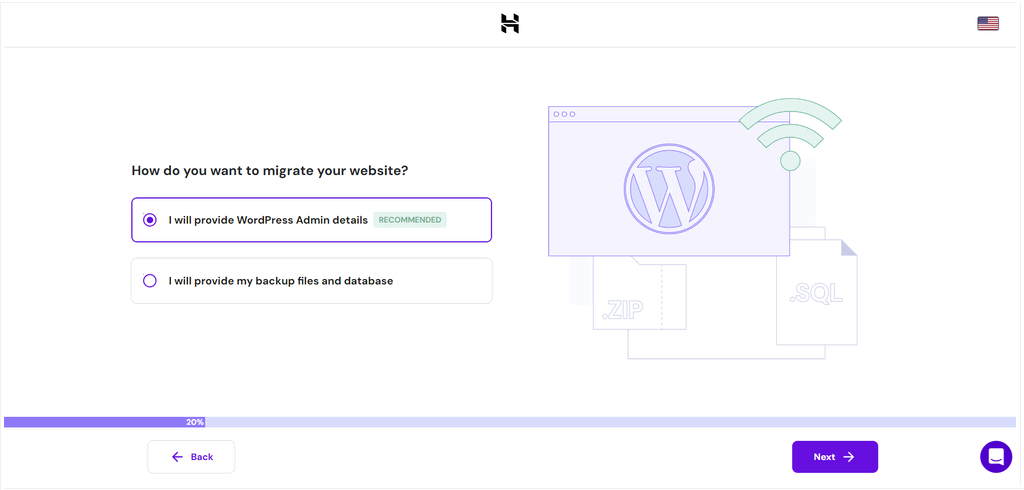
hPanel makes it easy to request a migration. Simply log in to hPanel and navigate to Account → Migrate Website. On the Manage Migration Requests section, click Add request. Enter your website’s domain name in the provided field and click Next.
For a live WordPress site, choose I will provide WordPress Admin details and enter your WordPress credentials for verification. Keep in mind not to change your domain’s DNS settings until the transfer is complete. If your website is offline, choose I will provide my backup files and database.
This step-by-step process ensures a smooth migration experience. Please allow between 2-48 hours for the migration to complete. You can track the progress on the Migrations Requests page or in the Websites section of hPanel.
Post-Migration Steps
Little effort is required after the migration process is complete. Point your old domain to Hostinger, and the domain name system (DNS) propagation process typically takes 24-48 hours. To verify if the transfer is successful, enter your Hostinger plan’s IP address on SkipDNS.
It’s crucial to review your site’s configuration, update any necessary settings, and test all pages, links, and media to ensure they’re loading correctly. This ensures a seamless transition for your visitors.
Step-by-Step hPanel WordPress Migration: From Database Prep to Final Checks
All you need to do is follow these step-by-step instructions to manually migrate your WordPress site using hPanel.
Now, let’s look into the manual migration process using hPanel, which requires a bit more technical expertise but gives you full control over the transfer.
This method is ideal for those who prefer a hands-on approach or have specific customization goals for their website.
Preparing Your Database and Website Files
On your current hosting control panel, access phpMyAdmin and select your WordPress database. Then, click the Export tab, opt for the Quick export method and SQL format, and download your database file.
Next, navigate to the root directory of your site via the File Manager or an FTP client like FileZilla. Download all your WordPress files to your computer, including the wp-content folder, which contains your themes, plugins, and media files.
Database and website files are crucial components of your WordPress site. Make sure to download them correctly to avoid any issues during the migration process.
Creating a New Database and Uploading Files on hPanel
Files are now ready to be uploaded to your new hosting environment. Purchase a web hosting plan at Hostinger and follow these instructions:
Access your hPanel dashboard and click on Databases. Create a new database by filling in the available fields and then click Create. Note down the database name, username, and password, as you’ll need these details later.
Files will be uploaded to the public_html directory in Hostinger’s File Manager. Click Upload → File to upload your site files.
Files are uploaded, but you still need to configure your database and website settings.
Configuring Your Database and Website Settings
Site configuration is a critical step in the manual migration process. Update the values next to the DB_NAME, DB_USER, and DB_PASSWORD lines in the wp-config.php file to reflect your new database details.
If you’re adopting a new Hostinger domain name, update the site address details in the database. To do this, open your database in phpMyAdmin and access the wp_options table. Edit the option_value for siteurl and home with your new URL.
Uploading files and configuring settings require attention to detail to ensure a smooth migration.
Post-Migration Checks
Migrate your site, and then thoroughly check it to ensure that all pages, links, and media are loading correctly.
Your website is now migrated, but it’s imperative to double-check everything to avoid any issues.
Cloning Your WordPress Site: A Comprehensive Guide to Website Copying
Despite its simplicity, copying a WordPress website can be an effective way to migrate your site, especially if you’re staying with the same hosting provider. This method is ideal for those who want to create a duplicate of their existing site or move it to a new subdomain within the same hosting plan.
For beginners, copying a WordPress website is a straightforward process that requires minimal technical expertise. You’ll be guided through a step-by-step process, and the entire migration process can be completed in a matter of minutes. Since you’re staying with the same hosting provider, you won’t need to worry about transferring your site to a new server or configuring new database settings. The copying process will handle all the technical aspects for you, ensuring a seamless migration.
Requirements for Copying a Website
Level of technical expertise required: Basic To copy your WordPress website, you’ll need: * An existing WordPress website hosted with Hostinger * A new domain or subdomain within your Hostinger plan * Access to your hPanel dashboard Copying a website is a relatively quick process, and you can expect it to take around 15 minutes, depending on the size of your website.
Steps to Copy a Website Using hPanel
Using the hPanel dashboard, navigate to Websites → Copy Website. In the Copy from section, select the domain of your original site. From the To section, choose your new domain or subdomain for the new site. Click Start copying, and a warning about potential data loss will appear. If you’re ready to proceed, check the “I understand…” box and click Start copying anyway. The copying process will begin, and you can track the progress on the same Copy Website page. Once completed, the status will update to indicate successful duplication. It’s vital to note that only website files and databases are copied. You’ll need to manually configure any associated email accounts, FTP accounts, and SSH keys for the new domain.
Post-Copying Steps
One crucial step after copying your website is to update any associated email accounts, FTP accounts, and SSH keys for the new domain. This ensures that all services are properly configured and functioning as expected. hPanel provides an intuitive interface for managing your website, making it easy to update these settings. Simply navigate to the relevant sections within your hPanel dashboard and follow the on-screen instructions. Remember to test your website thoroughly after copying to ensure all pages, links, and media are loading correctly.
Plugin-Powered WordPress Migration: Simplifying Site Transfers

Once again, migrating a WordPress site can be a daunting task, but using a plugin can make the process much easier and less time-consuming.
Difficulty-wise, migrating WordPress with a plugin is relatively easy, as it automates many steps involved in transferring your site. You don’t need to have extensive technical knowledge or experience with coding. Using a plugin like All-in-One WP Migration can save you a lot of time and effort, as it takes care of exporting and importing your site’s files, database, and plugins. This plugin is user-friendly and provides a step-by-step guide to help you through the migration process.
Overview of WordPress Migration Plugins
To migrate your WordPress site using a plugin, you’ll need to choose a reliable and trustworthy plugin. There are several options available, including Duplicator, UpdraftPlus, and All-in-One WP Migration. A popular choice among WordPress users is All-in-One WP Migration, which offers a free version with a maximum upload file size limit of 256MB. This plugin is known for its ease of use and reliability, making it an excellent option for beginners and experienced users alike.
Steps to Migrate WordPress Using All-in-One WP Migration Plugin

For migrating your WordPress site using the All-in-One WP Migration plugin, follow these steps: First, install and activate the All-in-One WP Migration plugin on your existing WordPress site. Then, go to the plugin’s settings page and click on the “Export” button. Select the files, database, and plugins you want to export, and choose a location to save the backup file. Next, create a new WordPress installation on your destination host, and install the All-in-One WP Migration plugin. Go to the plugin’s settings page and click on the “Import” button. Select the backup file you created earlier, and the plugin will take care of importing your site’s files, database, and plugins. Important: Make sure to test your site thoroughly after migration to ensure that everything is working as expected. Plus, using a plugin like All-in-One WP Migration can also help you to clean up your site by removing unused plugins, themes, and media files, which can improve your site’s performance and security.
Post-Migration Steps
Clearly, after migrating your WordPress site, there are a few post-migration steps you should take to ensure a smooth transition. Another important step is to update your site’s URLs and DNS settings to point to your new host. This may take some time to propagate, so be patient and monitor your site’s status closely. Remember: It’s crucial to test your site thoroughly after migration to ensure that everything is working as expected, including links, images, and plugins.
Mastering Manual WordPress Migration in cPanel: From Prep to Post-Transfer
Now, let’s examine the manual migration process using cPanel, which requires a moderate level of technical expertise.
On average, this method takes around 2-4 hours to complete, depending on the size of your website and your familiarity with cPanel. Make sure you have a good understanding of cPanel and PHPMyAdmin before proceeding. You’ll need to have access to both your current hosting provider’s cPanel and your new hosting provider’s cPanel. This method is suitable for those who are comfortable with manual file transfers and database management.
Preparing Your Database and Website Files
Some necessary steps must be taken before you begin the migration process. First, create a full backup of your WordPress website, including all files, folders, and the database. This backup file will serve as a safety net in case anything goes wrong during the migration process. Database backups can be created using plugins like UpdraftPlus or through your current hosting provider’s backup tool. Make sure to download the backup file to your local machine. Additionally, review your current site’s settings, such as permalink structures, widget settings, and theme options, to ensure consistent configuration on the new WordPress site.
Database backups are crucial in case something goes wrong during the migration process. Always keep a backup of your database and website files before making any changes.
Creating a New Database and Uploading Files on cPanel
cPanel provides an easy-to-use interface for creating new databases and uploading files. First, log in to your new hosting provider’s cPanel account and navigate to the Databases section. Create a new database by filling in the required fields, and note down the database name, username, and password. Next, navigate to the File Manager section and create a new folder for your website files. Upload your website files, including the wp-content folder, to the new folder using the File Manager or an FTP client like FileZilla.
Make sure to update the database credentials in your wp-config.php file to reflect the new database details.
Configuring Your Database and Website Settings
Creating a new database and uploading files is just the first step. You’ll need to configure your database and website settings to ensure a smooth transition. Update the values next to the DB_NAME, DB_USER, and DB_PASSWORD lines in your wp-config.php file to reflect your new database details. Additionally, update the site address details in the database by accessing the wp_options table in PHPMyAdmin. Edit the option_value for siteurl and home with your new URL.
It’s necessary to update your database credentials and site address details to ensure your website functions correctly on the new hosting provider.
Post-Migration Checks
Post-migration checks are crucial to ensure your website is functioning correctly on the new hosting provider. Check all pages, links, and media to ensure they’re loading correctly. Test your website’s functionality, including plugins and themes, to identify any potential issues.
Your website’s performance and security depend on regular updates and maintenance. Make sure to keep your WordPress core, themes, and plugins up-to-date to prevent security vulnerabilities.
Identifying the Right Time for WordPress Migration: Key Factors and Considerations?
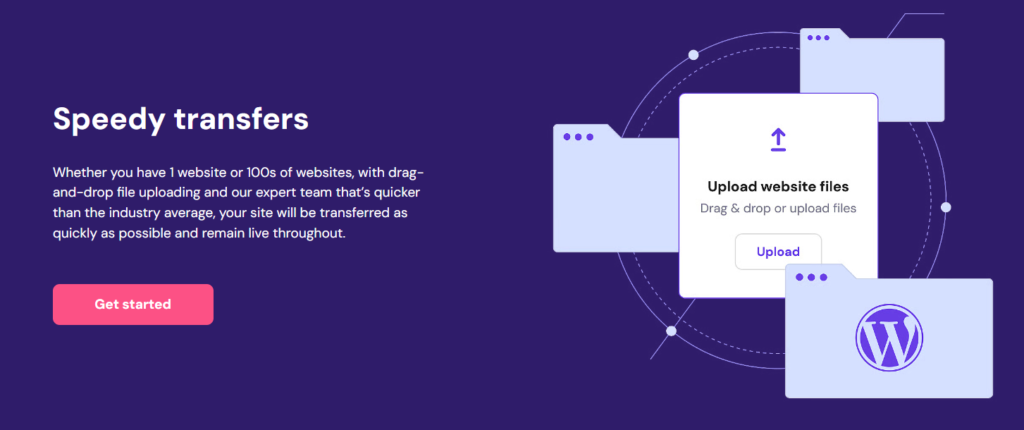
To ensure the continued success and security of your online presence, it’s necessary to know when to migrate your WordPress site. Whether you’re experiencing performance issues, security concerns, or simply want to upgrade to a better hosting provider, migrating your site can be a crucial step in maintaining a healthy online presence.
Reasons for Migrating a WordPress Site
One of the primary reasons for migrating a WordPress site is to switch to a better hosting provider. This could be due to performance issues, security concerns, or simply wanting to take advantage of better features and support. Another reason might be to upgrade to a more suitable hosting plan, such as moving from a shared hosting plan to a VPS or dedicated server.
Additionally, you may need to migrate your site due to compatibility issues with your current hosting provider or to take advantage of newer technologies and features. Whatever the reason, migrating your WordPress site can be a complex process, but with the right guidance, it can be done efficiently and effectively.
Factors to Consider Before Migrating
Some important factors to consider before migrating your WordPress site include:
- Backup and data integrity: Ensure you have a complete backup of your site, including all files, folders, and databases.
- Hosting compatibility: Verify that your new hosting provider is compatible with your WordPress site and its requirements.
- Plugin and theme compatibility: Check that your plugins and themes are compatible with the new hosting environment.
- Performance and security: Consider the performance and security features of your new hosting provider, such as caching, CDN, and SSL certificates.
Migrating your WordPress site requires careful planning and consideration of these factors to ensure a smooth transition. Perceiving potential issues beforehand can save you time and effort in the long run.
Migrating your WordPress site can be a daunting task, but by understanding the reasons for migration and considering the necessary factors, you can ensure a successful transition to a better hosting environment. In the next section, we’ll explore the various methods for migrating your WordPress site, including using hPanel, manual migration, copying your site, and using a plugin.
Top WordPress Migration Questions Answered: Expert Insights and Solutions
For those who are new to WordPress migration, we’ve compiled a list of frequently asked questions to help you navigate the process smoothly.
Does Hostinger offer professional WordPress migration services?
WordPress site owners who want to migrate to Hostinger can take advantage of their free migration service. This means that Hostinger’s dedicated team will handle the entire migration process for you. All you need to do is fill out a migration request on hPanel, and they’ll take care of the rest. This service is available for free, making it a convenient option for those who want a hassle-free migration experience.
Before initiating a migration request, make sure to disable any two-factor authentication (2FA) or anti-bot features on your current hosting account and wp-admin area. Also, ensure there is sufficient disk space on your current server to facilitate a backup.
Is it possible to transfer my WordPress website to a different hosting provider?
Migrating your WordPress site to another host is definitely possible. In fact, it’s a common practice when looking for better performance, security, or pricing. You can migrate your site to any hosting provider that supports WordPress, including Hostinger, Bluehost, SiteGround, and more.
When migrating to another host, you’ll need to create a full backup of your site, install WordPress on the destination host, put your site in maintenance mode, review and adjust settings, and clean up your site. This ensures a smooth transition and minimizes downtime for your visitors.
With the right approach, migrating your WordPress site to another host can be a great opportunity to reevaluate your site’s setup and make improvements for better performance and security.
Which methods can I use to migrate my WordPress site between web hosts?
Site migration involves several steps, including creating a full backup, installing WordPress on the destination host, putting your site in maintenance mode, reviewing and adjusting settings, and cleaning up your site. You can choose from various migration methods, including using a plugin, manual migration, or seeking assistance from your hosting provider.
Regardless of the method you choose, it’s important to test your site on the new host using a staging environment to ensure a smooth transition without impacting your live site’s functionality or user experience.
It’s also crucial to update your site’s URL and DNS settings to point to the new host. This may take some time, so plan accordingly to minimize downtime.
How much time should I allocate for migrating my WordPress website?
Another common question is how long the migration process takes. The answer depends on the size of your site, the complexity of the migration, and the method you choose. On average, a WordPress site migration can take anywhere from 2-48 hours, depending on the factors mentioned above.
Plus, you’ll need to consider the time it takes for DNS propagation, which can take up to 24-48 hours. During this time, your site may experience some downtime, so it’s important to plan accordingly and communicate with your visitors.
Optimizing Your WordPress Migration: Expert Strategies for a Flawless Transition

Unlike other complex tasks, migrating your WordPress site can be a relatively straightforward process if you’re well-prepared. To ensure a seamless transition, follow these vital tips:
- Backup your site: Create a full backup of your WordPress website, including all files, folders, and the database.
- Test your site: Test your site on the new host before making it live to ensure everything is working as expected.
- Minimize downtime: Put your site in maintenance mode to prevent changes during the migration process.
- Review and adjust settings: Check your current site’s configurations and replicate them on the new WordPress site.
- Clean up your site: Remove any unused plugins, themes, or media files to ensure a lighter and faster site.
Knowing these tips will help you avoid common mistakes and ensure a smooth WordPress migration.
Importance of Backup and Testing
The key to a successful WordPress migration is having a reliable backup of your site and testing it thoroughly on the new host. This ensures that you can restore your original site if anything goes wrong during the migration process. Additionally, testing your site on the new host helps you identify and fix any issues before making it live.
By having a backup and testing your site, you can avoid losing valuable data, minimize downtime, and ensure a seamless transition to your new hosting environment.
Minimizing Downtime and Errors
On average, a WordPress site migration can take anywhere from a few hours to several days, depending on the size of your site and the complexity of the migration process. To minimize downtime and errors, it’s vital to plan carefully and execute the migration process during off-peak hours.
Tips for minimizing downtime and errors include putting your site in maintenance mode, disabling caching plugins, and reviewing your site’s configurations before migrating.
Optimizing Your Site for Better Performance
Even with a successful migration, your site’s performance can suffer if it’s not optimized for the new hosting environment. To ensure your site loads quickly and efficiently, consider optimizing your images, minifying CSS and JavaScript files, and leveraging browser caching.
A well-optimized site not only improves user experience but also boosts your search engine rankings and conversions.
Additionally, consider using a content delivery network (CDN) to distribute your site’s content across multiple servers, reducing the load on your primary server and improving page load times.
Overcoming WordPress Transfer Challenges: Solutions to Frequent Problems

Keep in mind that even with careful planning, WordPress migration can sometimes encounter errors. Being aware of these potential issues and their solutions can save you time and frustration.
Database Connection Issues
If you encounter database connection issues during migration, it may be due to incorrect database credentials or insufficient permissions. Check your database username, password, and hostname to ensure they are correct. Also, verify that the database user has sufficient permissions to access and modify the database. If you’re still experiencing issues, try resetting your database password or contacting your hosting provider’s support team for assistance. Remember to update your wp-config.php file with the new database credentials.
File Upload and Download Errors
Issues with file uploads and downloads can occur during migration, especially if you have a large number of files or a slow internet connection. To resolve this, try uploading your files in smaller chunks or using a faster upload method, such as SFTP or FTPS. Upload large files, such as images and videos, separately to avoid timeouts and errors. You can also use a plugin like Duplicator or All-in-One WP Migration, which can handle large file uploads and downloads more efficiently.
Configuration and Settings Issues
While migrating your WordPress site, you may encounter configuration and settings issues, such as incorrect permalink structures or widget settings. To resolve this, review your site’s configuration and settings before migration and make note of any specific customizations. After migration, check your site’s configuration and settings again to ensure they are correct. Update any incorrect settings, and test your site thoroughly to ensure everything is working as expected. Migration to a new hosting environment is an excellent opportunity to review and optimize your site’s configuration and settings. Take this chance to declutter your site, remove unused plugins and themes, and optimize your database for better performance.
Optimizing Your Newly Migrated WordPress Site: Key Maintenance Tips and Tricks
Not only is migrating your WordPress site a crucial step, but also maintaining it properly after the migration is equally important. In this section, we’ll cover the best practices to ensure your site runs smoothly and securely.
Regular Backup and Updates
Little do people know that regular backups and updates are important for maintaining a healthy WordPress site. After migration, make sure to set up a regular backup schedule using a reliable plugin like UpdraftPlus or VaultPress. This will ensure that your site’s data is safe in case of any unexpected issues. Additionally, keep your WordPress core, themes, and plugins up-to-date to prevent security vulnerabilities and ensure compatibility. Regular updates will also improve your site’s performance and fix any bugs that might have arisen during the migration process. Be mindful of, a single outdated plugin can compromise your entire site’s security.
Security and Performance Optimization
On top of regular backups and updates, it’s crucial to optimize your site’s security and performance. After migration, review your site’s configuration to ensure that all security measures are in place. This includes enabling two-factor authentication, limiting login attempts, and monitoring your site’s activity logs. You can use plugins like Wordfence or MalCare to scan your site for malware and vulnerabilities. A slow site can lead to a high bounce rate and negatively impact your search engine rankings. To optimize your site’s performance, consider using a caching plugin like W3 Total Cache or WP Super Cache. These plugins will reduce your site’s load time and improve overall user experience. Site performance is critical, especially after migration. Ensure that your site is optimized for speed by compressing images, minifying CSS and JavaScript files, and leveraging browser caching.
Monitoring and Troubleshooting
Any issues that arise after migration can be quickly resolved with proper monitoring and troubleshooting. Set up a monitoring tool like Uptime Robot or Pingdom to keep track of your site’s uptime and performance. This will alert you to any issues before they become major problems. Regularly check your site’s error logs to identify and fix any issues promptly. Use a plugin like WP Debugging or Query Monitor to debug your site and identify performance bottlenecks. For instance, if you notice that your site is experiencing slow load times, you can use a plugin like GTmetrix or Pingdom to identify the cause and optimize your site accordingly. By monitoring your site’s performance and troubleshooting issues promptly, you can ensure a seamless user experience for your visitors.
To wrap up
So, you’ve made it to the end of this comprehensive guide on migrating your WordPress site. By now, you should have a clear understanding of the various methods to migrate your WordPress site, including using hPanel, manual migration, copying your site, and using a plugin. Remember to always prepare your site before migration by creating a full backup, installing WordPress on the destination host, putting your site in maintenance mode, reviewing and adjusting settings, and cleaning up your site.
Regardless of the method you choose, take your time to follow each step carefully to ensure a seamless and error-free migration. If you encounter any issues, don’t hesitate to reach out to your hosting provider’s support team for assistance. With these 5 effective ways to migrate your WordPress site, you’re now equipped to move your site to a new hosting provider with confidence.

